
A popular product that provides fast wireless access is the Netgear A7000 WiFi USB Adapter. Nonetheless, to ensure a smooth sailing experience, you must have the correct Netgear A7000 driver installed on your Windows or macOS. Without the right driver, your adapter may not function correctly, resulting in an unstable, slow, or no internet connection at all.
In this article, we’ll cover:
- How do you install the latest Netgear A7000 driver?
- Step-by-step installation guide. Diagnosing the common issues.
- FAQs for quick answers
Table of Contents
Why Do You Need the Netgear A7000 Driver?
All hardware devices have drivers that enable communication with the operating system. A7000 driver is required on your computer to recognise and utilise the adapter.
Key Benefits of the Driver:
- Increases WiFi range and efficiency
- Able to work with the latest Windows and macOS updates.
- Fixes bugs and network issues
- Improves the overall browsing, gaming, and streaming experience.
How to Download the Netgear A7000 Driver
You can safely download the official driver in the following way:
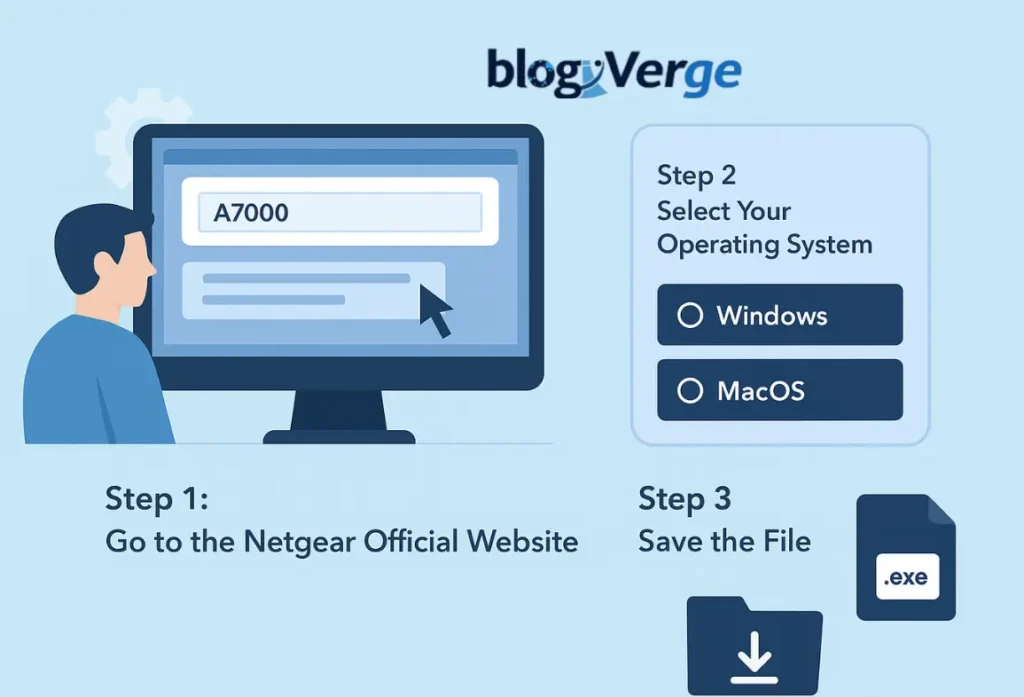
Step 1: Go to the Netgear Official Website.
- Go to the Netgear download centre.
- Type A7000 in the search bar.
- Choose your model in the drop-down menu.
Step 2: Select Your Operating System.
- Depending on the system, choose either Windows (10/11/8/7) or macOS.
- Download the latest available driver version.
Step 3: Save the File
- Copy the file to a familiar place, either the Windows file (.exe) or the Mac file (.dmg).
How to Install the Netgear A7000 Driver

On Windows:
- After the download finishes, double-click the downloaded .exe.
- Follow the on-screen instructions of the setup wizard.
- Reboot your system after finishing the installation.
- Plug your Netgear A7000 adapter and connect it to WiFi.
On macOS:
- Open the .dmg file.
- Drag the driver to the Applications folder.
- Restart your Mac.
- Insert the adapter and test connectivity.
How to troubleshoot the Netgear A7000 Driver Issues
Connection issues persist after installing the driver. Here’s how to fix them:

1. Driver Not Installing
- Ensure that you have a compatible version of the OS
- Temporarily turn off your antivirus software and try again.
2. Adapter Not Detected
- Attempt to insert the adapter into a different USB port.
- Install any available updates for your operating system and then reboot.
3. Slow WiFi Speeds
- Move closer to your router.
- Switch between 2.4GHz and 5GHz bands.
- Restart the driver installation if you encounter a problem.
Conclusion
The Netgear A7000 driver plays a crucial role in maintaining a stable and consistent Internet connection. By keeping up with your adapter, you’re solving common problems raised by the community, boosting your speed, and ensuring that your adapter keeps performing well and remains compatible with new system updates.
If you have any issues, follow the troubleshooting guide above to get back on track.
Tip: For your own safety, it is always best to download drivers from the official Netgear website. This not only keeps you secure against security risks but also ensures that you are running the most up-to-date version.
FAQs
Q1: Where can I download the latest Netgear A7000 driver?
Ans: It is available for download on the official Netgear Support Page.
Q2: Is the Netgear A7000 compatible with Windows 11?
Ans: Yes, though be sure to apply the most recent driver update to Windows 11.
Q3: Can I use the A7000 adapter without installing drivers?
Ans: No, the adapter must have drivers to be useful.
Q4: Why is my A7000 not connecting after I install the driver?
Ans: Reinstall the driver, update your OS, or use an alternative USB.
Q5: How often should I update the driver?
Ans: Update checking should be performed after 3-6 months to ensure the version is compatible and stable.
